Breaking down 3 more Baazaria units: (Skeleton Bladelord, Obayifo Aeromancer, Bonesteel Colossus)
(Check out Baazaria pt. 1 here!)
SKELETON BLADELORD:
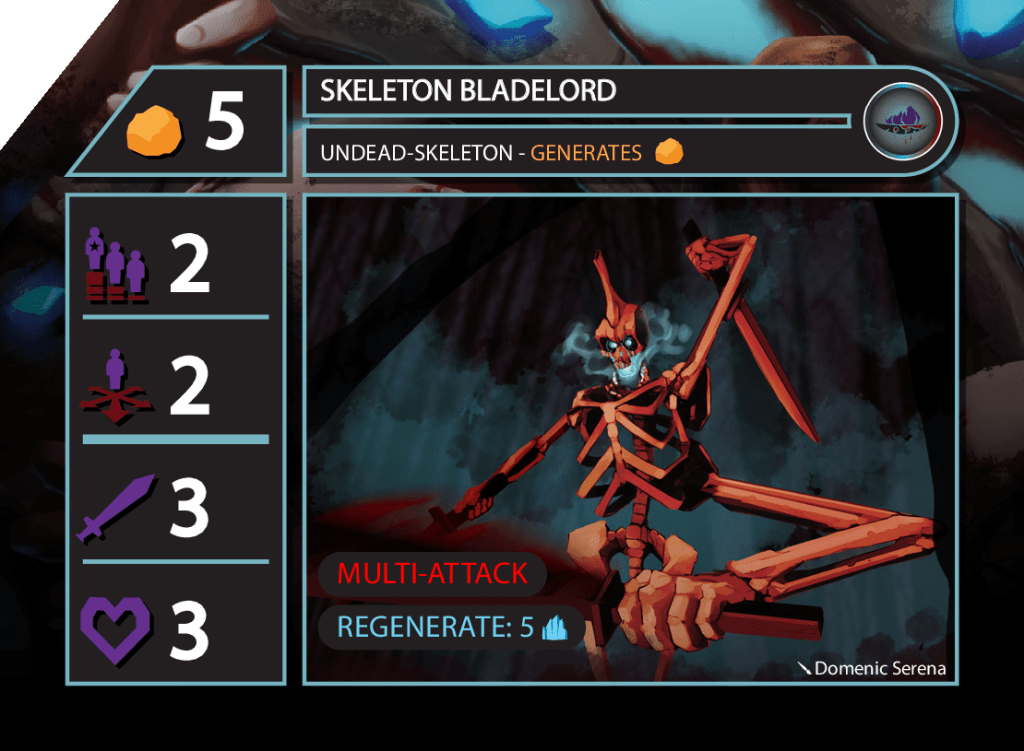
One of the units with the highest VP scoring potential on Baazaria’s roster is the Skeleton Bladelord. The Skeleton Bladelord seems to get a little overlooked for some reason, but it is an important melee unit for Baazaria. It’s got a better Rank than Zombie Goliath, and while it doesn’t have the health of the Goliath, it’s a far better offensive unit. The Bladelord’s Multi-Attack should be feared, and Regenerate enables it to score points more often than not, especially when Baazaria has mana to spare. The Skeleton Bladelord really shines when it is used as a secondary attacker- letting units like Bloodreaver Wraith or Asanbosam Warlord be the focal point of the Baazaria attack, while handling smaller enemies and regenerating to deal valuable damage to larger foes. The fact that the SB generates gold is also crucial, as the Baazaria often finds itself needing every piece of gold they can gather.
Unfortunately for the Skeleton Bladelord, occasionally it finds itself as a tough fit for the Faction. Baazaria’s control based strategy centers around Deathstorm Lich and casting multiple Deathwave spells, using high hit point units to insulate the Lich and fast units to finish off the wounded. The Skeleton Bladelord’s primary method of taking over a game involves the Bladelord using Regenerate until finding a key space to unleash a Multi-Attack– which can often take up a lot of mana-mana that could otherwise be used to help the Lich-led strategy.
WHEN TO WARBAND: The Skeleton Bladelord makes for a great offensive unit against faster paced Factions that can cross the board quickly. This enables the Bladelord to use some of Baazaria’s mana to regenerate until finding a Multi-Attack opportunity to critically wound multiple enemies Moonshadow and Doomsand would be great matchups.
WHEN TO BENCH: Factions that can be more patient like Zermano and Ihalaban are tougher matchups. Baazaria has a strategy for these types of battles, but it involves keeping as much mana as possible for Deathwave and Paralyze spells- The Skeleton Bladelord might find itself unable to have much of an impact without being able to regenerate.
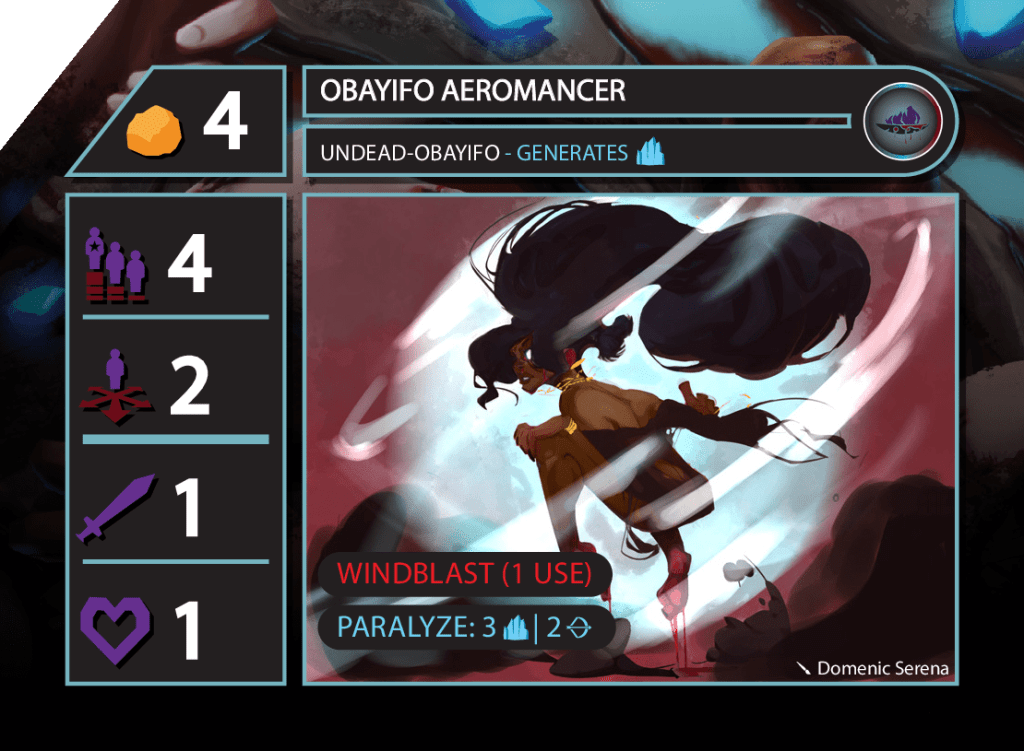
As a unit that does not score points, but helps significantly in her niche role, the Obayifo Aeromancer is a really nice unit to have available. She is a great secondary board controller, thanks to her excellent Rank and Paralyze spell. This allows her to activate early and “red-check” an important enemy before that enemy has a chance to move on your units. Her Windblast is always extremely useful as well- helping dispose of hard to get smaller aerial units while wounding bigger, more dangerous ones. Obayifo Aeromancer makes for an important unit to help solidify control of the board- and that will always give her a key role in some Baazaria strategies.
If the tactics and flow of the battle don’t align with the Obayifo’s Windblast and Paralyze, she is going to have a hard time making an impact- and for 4 gold, while not overly expensive, you will need something that can do better than 1 health with no defensive skills. The Aeromancer’s rank is helpful, and maybe Paralyze or Windblast can be used, but if there are multiple units in the middle tiles or within reach of your basecamp, she is just not worth the easy 4 enemy VPs.
WHEN TO WARBAND: The Obayifo Aeromancer is a pure specialist- She is great against Zyan and Kragg, where she can use Windblast to put a dent in Zyan’s Aerial forces and Paralyze to keep Kragg’s large but low ranked units bogged down.
WHEN TO BENCH: Parada does not use a lot of Aerial units and don’t need to advance across the board to score points, making them a terrible matchup. Doom Sand poses major matchup problems with multiple area spellcasters that simply need to do 1 damage. Moonshadow is a bad matchup also, as they have several low-cost but high movement ground units that can rush the Obayifo.
BONESTEEL COLOSSUS:

Bonesteel Colossus (BAAZARIA) (6 Gold/VP)
One of the few non-undead units in Baazaria, the Bonesteel Colossus is a bonafide round-eater. It’s most useful statistics are it’s massive 9 health and it’s ability to generate gold. This gives it a distinct role as a bodyguard and damage absorber. The Bonesteel Colossus is can slog up to a resource center or in front of the Deathstorm Lich and simply stand at the ready, in place, take damage, and fend off enemy units. The Colossus can also be used as a back-line resource generator. It’s high health allows it to survive quite awhile, and it’s terrible rank and movement usually means it’s not going to be a high priority target for enemies.
Speaking of those Rank and Movement attributes- they are indeed terrible. The Bonesteel Colossus takes forever to get where you need it, so it rarely leaves the immediate area around your basecamp. Fortunately, this means it can protect the likes of Deathstorm Lich and Bazaaria Necromancer… But outside of that, savvy enemies can manipulate the Bonesteel Colossus by stacking attacks prior to the Colossus activating, accelerating the elimination of the Bonesteel Colossus. Also, without the proper units in place to control the board, or outside of being a part of a vanguard, there is no feasible time to recruit the Bonesteel Colossus, as it’s minimal Rank and Movement make negate any offensive value that it might provide.
WHEN TO WARBAND: The Bonesteel Colossus is ideal when it can protect other Baazaria units that are best suited to control the battle without moving to the frontline. This makes it great against Kragg or Primus, where it can withstand melee hits and buy time and resources.
WHEN TO BENCH: Factions with solid rank and lots of activations like Parada and Doom Sand will expose the Bonesteel Colossus, often infiltrating defenses and disrupting the Baazaria strategy before the Colossus can get into position.
